Showing posts with label gifts. Show all posts

09 August 2014

shameless plug

Have you started thinking about Christmas cards? 
Cards for gifts? 
Gift tags?
Teacher/ hostess gifts?

Well the holidays will be here before you know it. Now is the time to place an order with me for your handmade personalized paper crafted items. Head over to my website and see what I currently have for sale as well as examples of what I have created in the past.

Don't see what you are looking for? Please ask. I am always up for a challenge to create an item that you will fall in love with and be proud to give.

Click on the image below to get to my website.


I can be reached at my email as well as on Facebook. 
Click the image below to get to my FB.


I hope I can create something amazing for you!

08 August 2014

do you yoga?

I do.

Finally.

My friend Catrina started her yoga teacher training last year and I didn't think I could do it. Seriously. I am not the most limber or athletic of types. I have not done much moving since I broke my leg six years ago. Yet with Catrina's encouragement I have started taking yoga classes. And guess what?? I totally love it! What a great workout and a relaxing time all rolled into one! My only regret is waiting so long to take her up on her offer to teach me.

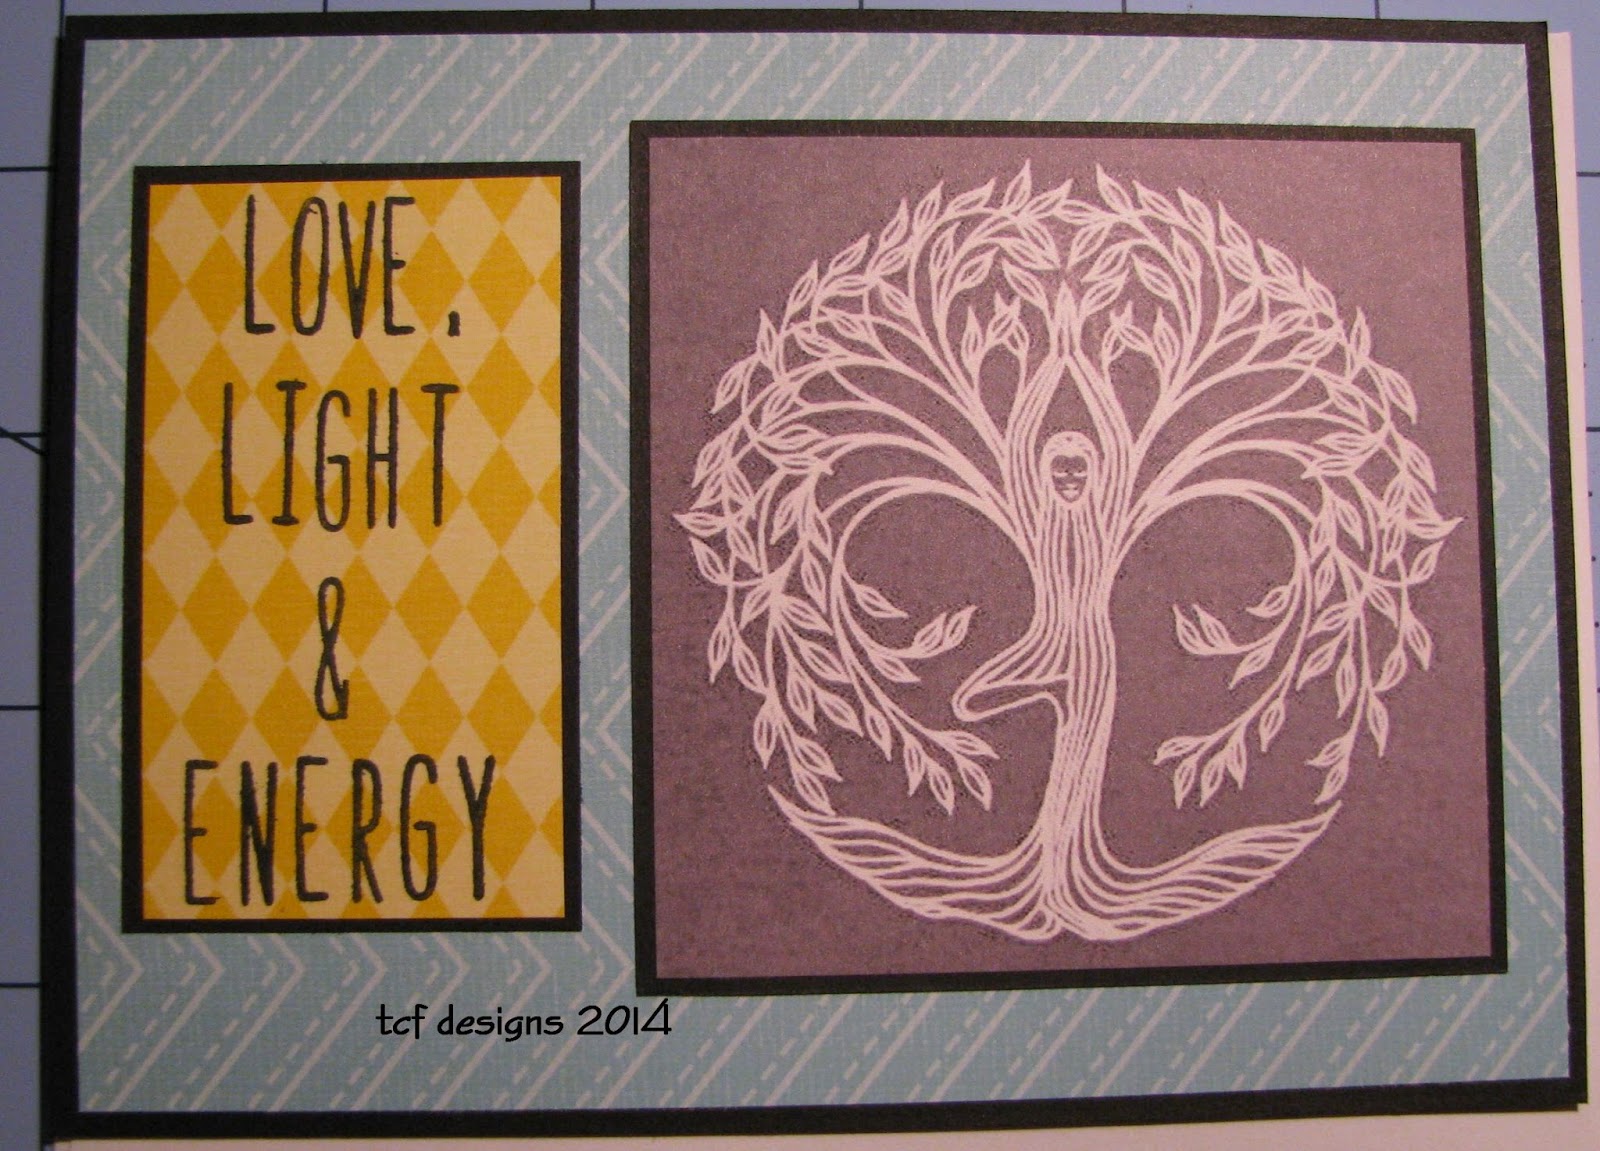
Catrina graduated at the end of July and is now a full fledged yoga teacher and amazing at that!! She asked if I could come up with some yoga themed greeting cards for her to write her clients notes on. Sure why not?! I asked her favorite colors as well as her favorite yoga poses (tree and lotus) and hit the Google Images for free images from the internet.

Below are the cards I created for her as a thank you for inspiring me to get moving as well as a congrats for completing her training!


Love, Light, and Energy is her FB page- check it out.


If you are in the market for any yoga cards (or any other type of cards for that matter) give me a shout via email and I would be more than happy to create some personalized cards for you.

25 January 2014

if it's not messy it's not fun

I mean seriously, what could be a better quote than that?? When we are kids it is expected but not so much when we are adults. That is totally not fair by any means! Nothing wrong with getting messy and having fun. I saw this amazing canvas on Pinterest and I knew that I HAD to create it for my special friend who just so happens to be an amazing kindergarten teacher. It is so her (and me when I volunteer in her room) I knew that this canvas had to be made and hung near the art table in her classroom. So off to work I went.
I started by snagging a canvas from Kira's stash since she hasn't been doing any painting since she received them. Might as well use one!! I picked up some fun stickers at Target since we ended up in the area one night. I was hoping for some plastic ones but these ones worked okay. They were fuzzy and really meant for a scrapbook or a fun sign- not to be destroyed with paint. All for a good cause!!


I laid out the message and then snapped a quick picture of the colors I was using. In theory pretend they are jade green and lapis blue. Because I did. Kira actually helped me pick the colors since she is the resident artist in the family.


 Then I started putting the paint on the canvas with my hands (safely covered with rubber gloves. I mean I like messy but still let's not ruin the manicure) I had so much fun squishing the paint all around the letters and making finger prints and a handprint and finger swirls. Loved it!

Then the total work part of the project- getting the letters off of the canvas!! I guess I secured them too well on a couple. But I did manage to get them off. I pulled them off when the paint was still wet as I didn't want to tear the paint off after it had dried.


Work in progress. You can see the painted letters to the side.


What I think is the completed project. Loved it!! 


Another overhead shot. And as I was looking at it, I decided it needed something else. I mean it is messy and all.... but it didn't look messy enough. Does that make sense??


So I waited for the paint to all dry and then used some glitter spritz in gold and silver to make some flashes of fun and then I mixed up some glue, water and glitter and applied that over most of the white space that was left. You know, kindergarten is all about the glitter!! The heart shape that is on the hand print is for the first day of school project that my teacher friend does every year for the kissing hand. It is all glitter and sparkly.


Close up of the seriously glittered corner!


It was so much fun to give it to her!! Seriously it was perfect. I think every kindergarten/ preschool teacher needs this for their room! Maybe even the art teachers!! Thank you Pinterest for helping me out with this!!

And here it is on the wall of the classroom. Hanging near the art table. You can see it from the door and all around the room. PERFECT!!


Go make a mess today!!

08 January 2014

teacher christmas gifts 2013

I have the pleasure of helping out in one of the kindergarten rooms with an amazing teacher and her equally amazing helper/ partner in crime/ friend/ paraprofessional extraordinaire. I help out twice a week so I can hang with both the AM and the PM classes. Cutest littles ever!!

But once again I digress.....

I made each of these ladies a set of eight cards for a Christmas gift. So much fun as I love making cards!! I also love using a new tool. I picked up the Fiskars hexagon punch on the black Friday weekend for a steal at Joanns. I also purchased a corner punch from Fiskars to replace the one I misplaced in my office and got both punches for under $10. Seriously happy day for me!!

So using my new hexagon tool I went to work on some cards.


And there you have a fun little something to give to two ladies who let me come into their classroom and paint the children!!

04 January 2014

card organizer for mom

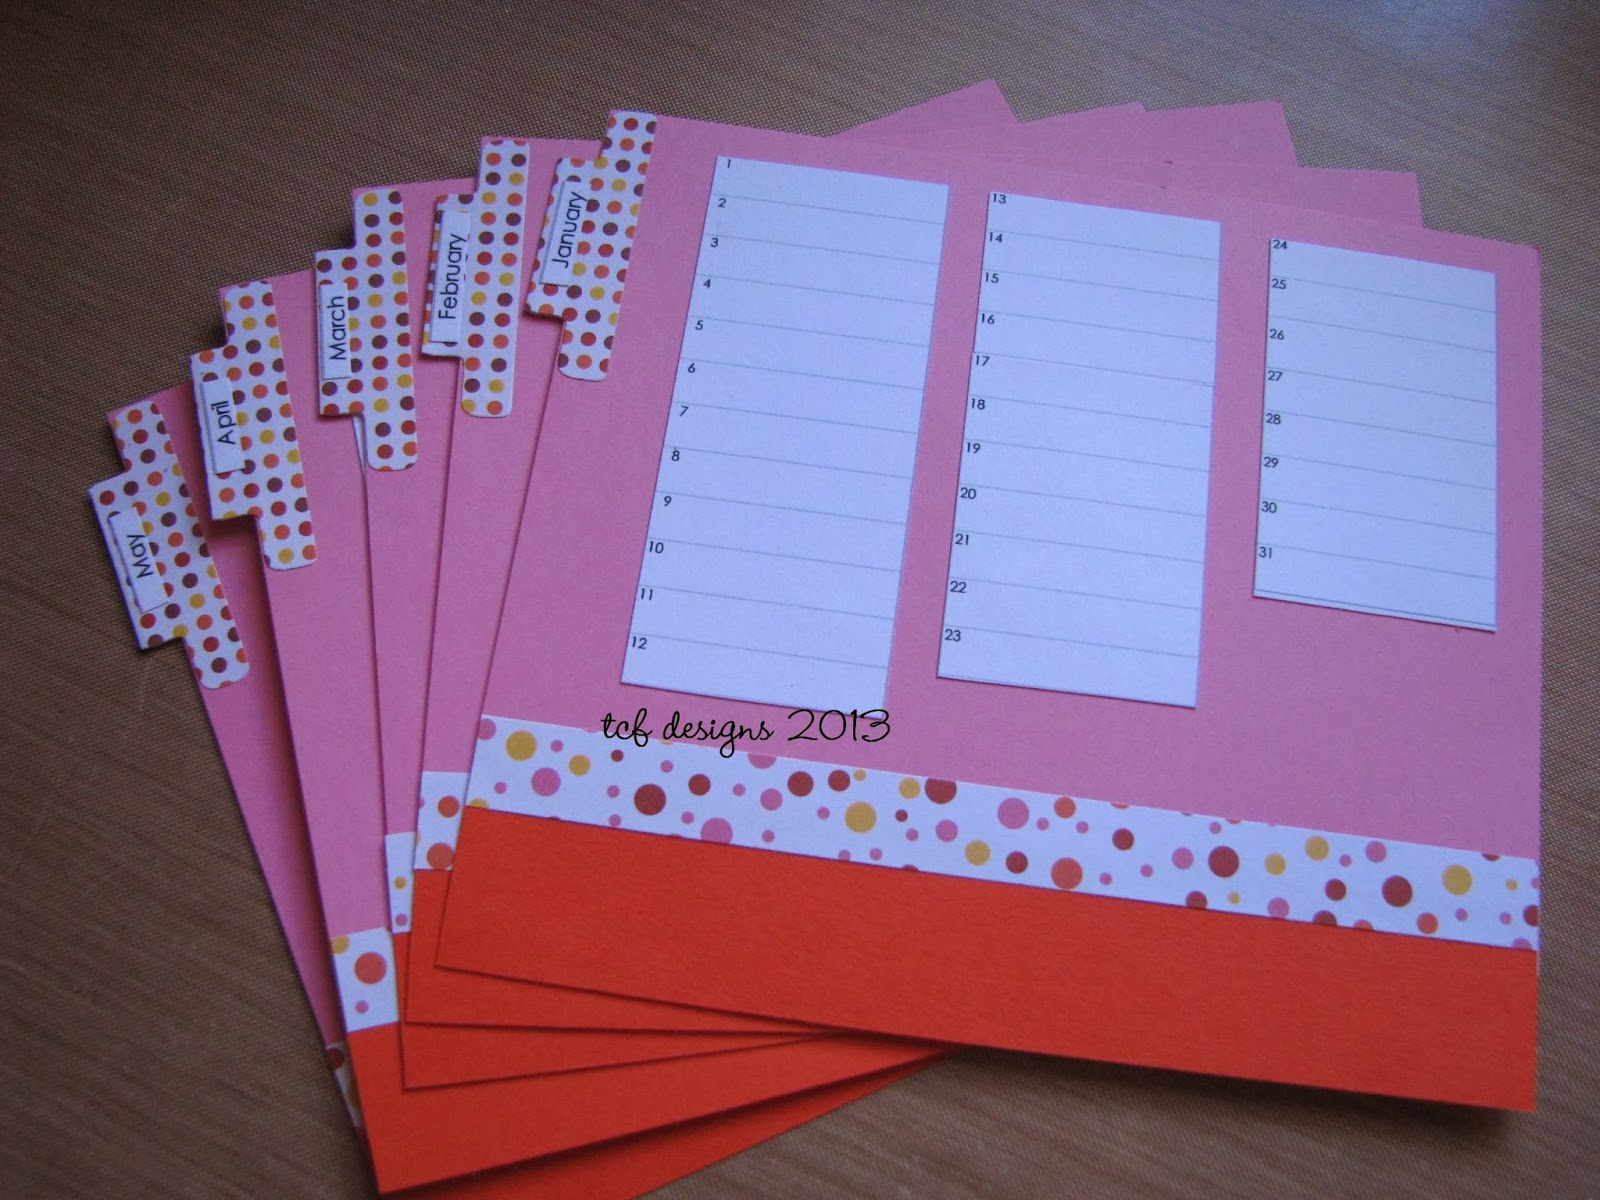
On one of my many blog ramblings, I found a card organizer tutorial here at Be Creative with Amy's blog. I thought it looked pretty and not too difficult so off I went! Some of the measurements were a bit off so I had to adjust here and there to make it work but it was a great jumping off point in this adventure!! Here it is before I added any decoration to the front.


These are the month dividers for the inside. I found a free calendar template that worked for me and printed and cut it to fit the dividers. Now mom can keep track of everyone's birthday, anniversaries and special occasions. 


Here is the front of the card organizer once I added my beaded flower. I cut the flower with a Spellbinders die and then hand stitched the seed beads into the center. I also spritzed the front with some of the Heidi Swapp color shine which added just enough pizzazz for mom.


Side view with the organizer all full up with handmade cards. There are 24 cards in there. Standard card size including envelopes. Yup, the lizard cards are living in there now. Along with a few others. Some of which I have already posted but didn't mention they were for this organizer.


03 January 2014

who loves lizards??

My mom!! Well not really but it is a family joke which will not die. The kids seem to be keeping it alive more than hubby or I but when I saw these adorable lizard stamps, I knew who had to have some cards created with them!!

I will let the little guys do the talking for me. 


All of these cute guys are now happily residing with my mom in her Christmas present. I created her a card organizer complete with monthly dividers so she can keep track of birthdays and such. Hoping to post those pictures tomorrow for your viewing pleasure. Anywho, these little guys were so much fun to make and very colorful. I think I could learn to like lizards if they were as adorable as these!!

22 December 2013

watch the seasons pass

Have you checked out stamps from Paper Smooches?? OMG! I totally love their images and their blog is so inspiring. And yes they have an educational blog with videos and more inspiration there. I have a few sets of their stamps and if I won the lottery I would own each and every one of them- dies too!!

I came across this amazing image on their blog created by Lynn Mangan and HAD to create the precious tree for each season. Seriously, how perfect is that tree???


The fun part was finding the perfect green shades for spring. 


Sorry for the blurry picture. Guess I was very excited about these cards.


It is a bit hard to see in the picture, but the leaves have been stamped at the base of the tree in white.


The stamp sets I used for these cards are all Paper Smooches. the Gently Seasoned stamps for the tree, Bold Blooms for the leaves, and the words are created with the Alphadot set.

I made this set for a special friend of mine who loves trees (and decided she HAD to move back to Canada). I will be making more of these as I simply love them.

21 December 2013

monster high layout

I had the pleasure of working with some very girly papers and such for a friend of mine. She was going to cut my hair and I was creating the following layout for her in exchange. I had to first figure out the whole Monster High thing. My Kira has not gotten into them so it was a total learning thing. Plus the specific request was for a Clawdeen Wolf. Worked out pretty well as she is dressed in purple and pink!! Right up my alley!

Here is the completed layout in all of its glory.


I used Bazzill paper and some fun specialty papers from Michaels to complete this layout. The bling I had. I did have to purchase the tiger print ribbon but it was for a good cause. I tied the tiny bows myself. I have an amazing tool to help me do that. I used my Sybill (Silhouette original) to cut the title as well as her name. I used a font which was pretty close to the Monster High one. Thanks to my friend Bobbi for helping with that!! 


The layout is inspired by a PageMap and for the life of me now I cannot remember which one. But those are always a good place to start!! The claw print on the other page as well as Clawdeen and the skull head are all images I pulled from the internet and printed out on photo paper. I didn't like how it looked on regular cardstock at all. I then cut out the images to use. Clawdeen came out so darn cool. She looks like a sticker!! I used a couple of my Fiskars border punches (one on each page) and more bling!!


Happy to say that she did love these pages. Her problem now is to decide on using them for a birthday celebration or for Halloween pictures!!

16 February 2013

valentine's day goodies

This year I have been working in Alex's classroom of amazing first graders and in one of the kindergarten classrooms for both the AM and PM classes (not to mention getting to hang in the art room once a week) and decided that I wanted to give Valentine's to all those kiddos. 

First came the decision as what to get them all. Since there is always a big demand for pencils in the first grade room, I went forth and found some cute ones at Target in their holiday area. Then somehow counted wrong and ended up with more boy pencils than girl pencils which did not work in a female dominated room. I then hit the dollar store and they saved the day for the girls!!

For the kindergartners, I decided on some fun colored super balls along with some foamie heart stickers. Thankfully I counted correctly when buying the super balls at Target (again in their holiday section) and managed to have a 'few' left over for my kiddos to have (or save them for next year!!)

Then came the decision of how to give these goodies to the kiddos. I decided on a pencil holder type card for the first graders. Below shows the inside of the card that I stamped. I also signed it for each of them.


I also stamped the front of the cards and added their names. I closed the card with some heart stickers I picked up at Michaels since I didn't like how they looked open. Yes I sharpened all the pencils since the students are not allowed to use the electric pencil sharpener in the classroom (sharpen pencils too much, push too hard etc etc) and that would not be fair to the teacher to have to sharpen all those pencils before the kids can use them.


This is a side view of one of the treats. I was pretty proud of myself!!


For the kindergartners, I decided to put their goodies into snack baggies and then add a tag. As I was surfing Pinterest (cuz everyone does) I found these so adorable tags. They seemed pretty easy so off I went. Below are all my love bugs set to be made into tags.


Here is the completed project! I stamped the sentiment onto the red paper and then attached them together with some floss I have. I added who it was to on top of the love bug. Perfect!!


And since I cannot forget the teachers... I made each of them a little bag to hold some Lindt goodness.


Hope your Love Day was a wonderful one!! xx